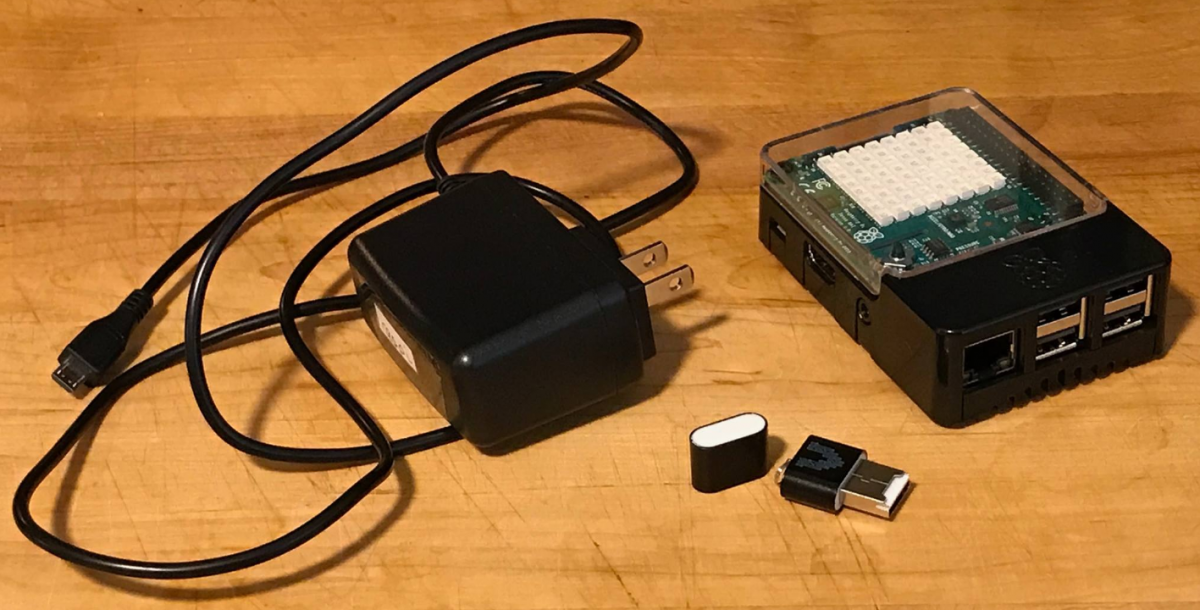
 This document explains how one can go about hosting a .com, .org, or other TLD domain website on a Raspberry Pi Model 3B Plus or 3B after you have the Raspberry Pi up and running. Here is the Raspberry Pi Model 3B Plus that I’m currently using to self-host my .com website. This Raspberry Pi runs the RaspbianOS operating system which is a variant of Debian Linux designed for the Pi.
In order to host your own website from home, you will need the following:
· Broadband Internet Service
· Registered domain name with ICANN through a registrar such as Google.com or other registrar
· Raspberry Pi 3 or 3B Plus running RaspbianOS or compatible OS (I will be using RaspbianOS)
· Raspberry Pi connected to the LAN wired or wireless via a Broadband router
· Install Apache2 Web Server, PHP, MySQL-Server, and MySQL-Client
· MobaXTerm in Windows 10 or Terminal in Linux
· SSH Server running in Windows 10 (MobaXTerm) or Linux and on the Pi
· SFTP Client (MobaXTerm in Win10) for accessing the Pi to provide a GUI for uploading Web content to Apache2 on a recurring basis
To get started, you’ll need to have a static IPv4 address assigned to your Pi on the private LAN. Mine is statically assigned 192.168.1.95/24. This IPv4 address is a Class C private IP address and is not accessible directly outside of your LAN from the Internet. It is essential that you statically assign the IPv4 address to your Pi or create a DHCP Reservation IP address for it so that if the Pi is shutdown for any reason for an extended length of time, DHCP (Dynamic Host Configuration Protocol) server running on your router which assigns IP addresses to all your local nodes on the LAN will not change its IPv4 address and so your Pi can be reached when it is powered on.
The next thing you’ll need to do is to SSH into the Pi either through a MobaXTerm session in Windows 10 or through the Terminal in Linux. I am assuming that you have SSH server running on the Pi. By default, this usually is the case, but if not, you’ll need to ensure that it is running. If you’re not familiar with Secure Shell sessions, the process to create a secure shell tunnel from Linux, for example, to your Pi is fairly straightforward. Open a Terminal in Linux and enter the following command:
ssh pi@192.168.1.95
and hit Enter. The example above is for my Raspberry Pi. You’ll need to substitute the IP address you see here for the IP address you statically assigned to your Pi. If you’re on a Windows 10 Pro machine, then you’ll need to create an SSH session in MobaXTerm with the same IP address you use in Linux to access your Pi. After you connect to your Pi , you’ll be prompted for the password for the user pi in order to establish the encrypted SSH tunnel. If you’ve never changed that password, the default password is pi. Thus, for the user whose home directory in Raspbian is /home/pi, the username and password are pi and pi, respectively. Note, in Linux both are case sensitive. If this is the first time you’ve created an SSH tunnel into your Pi, Linux will prompt you asking if you wish to make the connection. Respond with “Yes” and hit Enter and you’ll land at /home/pi, the home directory of the pi user and commands you issue from here on out will be executed on your Raspberry Pi rather than your local machine since you are connected to the Pi as though you were siting in front of it logged into RaspbianOS.
After you have successfully SSH’ed into your Pi, you’ll need to use sudo (Superuser Do) and provide the password for the user, pi, or you’ll need to run su and then supply the password for the root user because you will be installing some packages in RaspbianOS that require elevated privileges. Let’s assume you have logged in as root using su, then the command that you need to issue next is one that will install the Apache2 Web Server, PHP, the MySQL Server and MySQL Client. The command to run is:
apt-get install apache2 php mysql-server mysql-client
then, hit Enter and the install will begin. Follow the instructions to complete the installation. Once these packages have installed, you will need to make sure that the apache2 Web Server is running and enabled. RaspbianOS uses Systemd so the apache2 Web Server is run by a service running in Linux. The command to check on the status of the apache2 Web Server is:
systemctl status apache2
If the apache2 Web Server is already running and enabled, you’ll get something like the following returned in the Terminal output:
● apache2.service – The Apache HTTP Server
Loaded: loaded (/lib/systemd/system/apache2.service; enabled; vendor preset: enabled
Active: active (running) since Mon 2019-05-27 16:15:58 EDT; 1 day 6h ago
Process: 576 ExecStart=/usr/sbin/apachectl start (code=exited, status=0/SUCCESS)
Main PID: 640 (apache2)
CGroup: /system.slice/apache2.service
├─640 /usr/sbin/apache2 -k start
├─643 /usr/sbin/apache2 -k start
└─644 /usr/sbin/apache2 -k start
May 27 16:15:57 Raspi3BPlus systemd[1]: Starting The Apache HTTP Server…
May 27 16:15:58 Raspi3BPlus apachectl[576]: AH00558: apache2: Could not reliably determine the server’s fully qualified domain name, using 127.0.1.1. Set the ‘ServerName’ directive globally to suppress this
May 27 16:15:58 Raspi3BPlus systemd[1]: Started The Apache HTTP Server.
If you see Inactive (dead) instead of Active (running), then you’ll have to start the Apache2 Web Server by issuing the following command:
systemctl start apache2
and, finally, if you see anything other than service; enabled; vendor preset: enabled, then you’ll need to enable the apache2.service in Linux so that the apache2 Web Server starts automatically on startup or a reboot. To ensure this, perform the following command in the Terminal:
systemctl enable apache2
Rerun the status command shown above to verify that your apache2 Web Server is running and enabled and, if all looks well, you’re good to go.
Apache2 Web Server maintains its Web documents in /var/www/html on RaspbianOS. Contained in this directory is a file called index.html. This is the default web page that Apache2 looks for and serves up first when a request comes in to retrieve a web page on the Web Server. When you host your own web site and start creating content for index.html and any other web pages that index.html will link to, you will be needing to get to /var/www/html quite often. Since you are the user pi (by default) in RaspbianOS and you shouldn’t log in as root unless absolutely necessary since to do so otherwise for an extended period of time is a security risk, there are a few things that you’ll need to do to gain access to this directory and to do so easily.
The first thing you need to do is to change ownership of /var/www/html for both the user and group user since root is the user owner and group owner of this directory in RaspbianOS. To accomplish this, perform the following command in RaspbianOS:
chown pi /var/www/html
The chown command changes the ownership of what follows the user you designate. In this case, you’re changing ownership to the user pi for /var/www/html. Next, you’ll want to change the group ownership for this directory to the user pi as well by issuing a similar command:
chgrp pi /var/www/html
And, finally, so that you don’t have to consistently switch from pi’s home environment to /var/www/html in order to load web pages you create into that location for your hosted web site, you can create a symbolic link to this location from /home/pi by issuing the following command as root user:
ln -s /var/www/html /home/pi/html
then, hit Enter. When this symbolic link is created, an entry under /home/pi will be created that looks like this:
lrwxrwxrwx 1 root root 13 May 27 16:52 html -> /var/www/html
with a link called html (similar to a folder) that will be placed there. Any access to html from /home/pi will be identical to accessing /var/www/html so files that you copy to html will get copied automatically to /var/www/html as well. Later, when you access this location using the SFTP session created in MobaXTerm in Windows 10 Pro, you’ll be able to drop files directly into this location as though it were a folder in file explorer making it very easy to update your hosted web site.
If you go out onto your Windows 10 Pro platform or Linux platform and open your favorite Web browser (mine is Mozilla Firefox) and navigate to the WAN IP address assigned to your router. For example if my WAN IP address on the router was 96.14.23.89, then, if I type http://96.14.23.89 in my Web browser, I should now see the default Apache2 Web page. If, after typing in the WAN IP address provided by your ISP in place of mine in the example above you don’t see the default Apache2 Web page, then you’ll need to troubleshoot why you aren’t seeing it. When you create your first web page for your web site that you’ll be hosting on your Raspberry Pi, you will need to backup the default index.html by copying the file to index.html.save and naming your first page index.html so that Apache2 serves up that page rather than the default page. I am assuming here that you know how to copy a file in Linux or MobaXTerm in Windows 10 Pro in order to backup the default index.html file. We will talk about how we will be replacing the WAN IP address that you are using to access your web site below since folks accessing your self-hosted web site will not know your WAN IP. This is where obtaining a domain name and registering it comes in.
Before I get into how to go about purchasing a domain and registering it, I want to first describe how you need to configure your LAN’s router so that requests for port 80 coming from the Internet are directed to your Pi and served up by Apache2 Web Server running on the Pi and listening on port 80. It is essential that you perform this next step carefully or these port 80 requests outside your LAN on the Internet will never reach your Apeche2 Web Server. I’m referring to creating what is referred to as port forwarding on the router. If your router supports port forwarding–and every modern Broadband router has this capability–then here is how this is done. I will show you how I set up port forwarding on my own router and you will have to search your router’s interface until you locate it.
Essentially, what you need to do is forward traffic from port 80 to the IPv4 address of your Raspberry Pi on port 80 which is the port that Apache2 Web Server listens on. My router is an ASUS RT-AC68U router, and to get to the interface for port forwarding, I log into the router, select WAN on the left, then Virtual Server/Port Forwarding at the top of the screen as shown below. Once I am at the port forwarding interface, I enabled port forwarding by sliding the button to enable this. Then, next under Service Name, I typed Web Server–can be anything that you recognize as the service for which you are port forwarding–under External Port, I typed 80; under Internal Port, I typed 80 as well; under Internal IP Address, I typed 192.168.1.95–the IPv4 address of my Pi; and, finally, under Protocol, I typed or selected TCP, and the port forwarding is complete. On your router, you may need to Apply this setting by hitting the Apply button. On my router, this is not required. What this port forwarding process just accomplished is it opened a hole in the router’s firewall for port 80 traffic to travel from outside on the Internet to port 80 inside your local LAN to your Raspberry Pi to the Apache2 Web Server which is running and listening on that port for active requests to serve up web pages–your web site.
Now, it's time to talk about purchasing a domain and getting it registered. I used Google to buy my domain and Google was also my registrar. I’ll describe how to buy and register a domain on Google’s domain website. First, visit Google’s Domain website and once there, you’ll see that most domains cost $12 / year, if you’re purchasing the standard .com , .org, or .net TLDs. There is a search or a domain search box in the middle of the web site where you can enter the name you’re looking to purchase. In my case, I searched for: inlinuxveritas.com and was taken to a screen that stated this domain name was available to purchase at $12 / year. I already had a billing account setup with Google so I simply added the domain to my shopping cart, went to the cart, and purchased the domain name. If you don’t have a Google account, then when you add the domain to the shopping cart on the site, you’ll be redirected to establish a billing account from which to purchase your domain. This process is fairly straightforward and shouldn’t give you any problems. If the domain name you’re looking for is unavailable, you’ll be prompted to alternative names and TLDs that are available for that name; that is to say, if inlinuxveritas.com was already taken, I might have been able to purchase the same name with a .org or .net TLD instead. However, keep in mind that if you go outside of these common TLDs and wish to have .biz or .tv, for example, as the domain name suffix, then you may be paying more than $12 / year for those. Some are as high as $40 or more.
Once you have purchased your domain, then it is time to register it with ICANN and setup the DNS settings. You will be prompted for the ICANN registration process at time of purchase and by default, Google protects your privacy by turning on Web site privacy protection and locking the domain so that it can’t be moved or transferred. Privacy protection on the domain is essential for me since if someone comes across my domain website and wants to find out who the owner, webmaster (technical) or administrator for the site using a whois.net lookup, they will not see the private information I was required to give ICANN during registration. Instead, they will be given public information and if they need more info than is provided, they will be required to contact ICANN to request it. This information will not be provided to anyone without a good reason for having it, such as law enforcement. Privacy protection and domain locking are provided at no additional charge. In addition to those, you also receive the following services that may have a charge associated with them:
· Custom email with G Suite
· Easy integration with top web site designers
· Customizable sub-domains
· Fast, secure, and reliable Internet infrastructure through Google
· Simple domain management tools
· Email forwarding
· Support
The next step in the process after purchasing your domain and registering it is to go to Manage My Domains in the upper right-hand portion of the https://domains.google.com website and sign in to your account. Once signed in look in the left-hand sidebar for DNS and click on it. I highly recommend that you use the Google name servers rather than custom servers unless you’re transferring another domain to Google for management purposes. I enabled DNSSEC (DNS Security) for added security on my domain. Then, navigate to the Synthetic Records section, select the down-arrow in the box labeled Subdomain forward and choose Dynamic DNS. Since most ISPs provide its customers with WAN IP addresses that are dynamically assigned rather than permanently assigned–this is usually reserved for business customers only–then what we need to do here is establish an A record by placing www in the Subdomain field in front of .inlinuxveritas.com (representing my domain that I registered, yours will be different) and click ADD. Below this section, you will see Dynamic DNS above your domain with a > in front of it. Click the > and it will expand, then click view creditionals and this will expose the username and password that were assigned to you during the registration of your domain. These are needed for DDNS services that are available to you through Google or a 3rd party DDNS provider. What a DDNS provider does is offer a service to monitor your WAN IP address provided to you by your ISP and to follow the new WAN IP address for your domain when it is changed. This can happen weekly, monthly or even more regularly than weekly depending on the ISP that you have. It is essential to have a DDNS service monitoring your WAN because if the WAN IP address changes, and your domain doesn’t see the change, your self-hosted web site will no longer be accessible. Why? Because, if you recall, we accessed our self-hosted website intially by typing in https://96.14.23.89 before we registered our domain and setup the domain in DNS. After registering our domain in DNS, within a few minutes to as long as 48 hours later, the WAN IP address will be replaced by the domain address since DNS will recognize our new domain at the WAN IP address on the Internet. Therefore, in my particular case, within about 10 minutes after registering my new domain of https://datapioneer-network.org with my registrar of Google.com, I was able to access this web site by substituting this for the WAN IP address in the URL that I type in my Web browser and was able to reach my self-hosted site. But, if I don’t have a DDNS service running to monitor the WAN IP address and it changes, the web site will no longer be reachable. Which DDNS service you elect to use is your choice.
My choice for DDNS was to use Google’s API. This is self-explanatory on their website and so I will not go into detail regarding its usage. Essentially, you copy the information for the API and create a script in RaspbianOS and paste the information for the API into a file you can call dns_update_script.sh, for example, and place that file under /home/pi in Raspbian on your Pi. You will need to open the script file that you create here and copy and paste the username and password information provided by Google under Dynamic DNS > View Credentials, mentioned above for your domain, into the appropriate sections of the script that you place inside the .sh file. This .sh file is a shell script, and hence has the .sh file extension which RaspbianOS recognizes as a script. What you will need to do to make this script executable is to run the following command on the file as root user:
chmod +x /home/pi/dns_update_script.sh
which is the change mode command with +x adding the executable permissions on the file located under the /home/pi directory. If you run a listing on this file using the ls command, it will look like this in the Terminal:
-rwxr-xr-x 1 root root 208 May 28 13:04 dns_update_script.sh
the “x” in the permissions of this file on the far left indicates that the file can be executed by the file’s owner, the group owner of the file, and everyone else. Now, to run the dns_update_script.sh file whose contents should be similar to this:
wget https://username:password@domains.google.com/nic/update?https://datapioneer-network.org -O dns_update_results.txt && echo ” Last run: `date`” >> /home/pi/dns_update.txt
you will need to execute the script using the command as root:
./dns_update_script.sh
Note the ”.” in front of the “/” which is necessary to execute a .sh file in Linux. What this will do is run the script by going out on the Web, contacting Google, and accessing the domain account and checking the WAN IP address to see if it is the same or has changed since the last execution of the script. If the WAN IP has changed, then it will follow the new IP address. If it is unchanged, it will report that there is nochg indicating no change in the WAN IP. Note in the script’s contents that the username and password fields highlighted above must be replaced with the credential username and password that you viewed earlier which are associated with your domain when it was registered with Google. Also, note that your domain name will need to be entered in place of mine, which is showing as https://datapioneer-network.com. I have the dns_update_script.sh file running in RaspbianOS using cron so that it is run on a schedule automatically at 6pm everyday. If you don’t know what cron is or how to use it, then Google it or look it up in a Linux resource for its proper use.
That’s all there is to it. After performing the steps as outlined here, you, like me, will be able to successfully host your own domain website from your Raspberry Pi from your home and won’t have to pay for a hosting service to do this for you.
Good luck with your new domain website. Take advantage of the Web builders available in Google or simply write your own HTML5 code like I have. You can make your website as simple or as complex as you like using HTML5.