
Is it possible to configure a server such that one can ssh into that server internally on a LAN while being able to ssh into the network interface that communicates on the WAN out to the Internet? How do we handle this? Do we just open port 22 for ssh for both LAN and WAN and call it a day? Is this going to pose a security risk by allowing port 22 traffic from the WAN internally to our LAN? Can we even do this? The answer to this question is, YES! How can we take care of this without posing an unnecessary risk on our server? The answer to this second question is simple. The solution I’m going to discuss in this article is to show you a way that you can allow ssh on, say port 22 for the LAN, while being able to ssh into that same server externally on a WAN using another port, this time, say port 2347.
What You Will Need
You will need to have a server running an operating system, such as Linux, and two network interface cards. For the purposes of this article, I’ll be running Ubuntu Server 20.04 LTS (w/ DE) and the Uncomplicated Firewall (UFW) which Ubuntu works with natively. If you are working with a server and operating system on that server which does not support UFW, then you will have to modify the commands I’ll be showing you here for setting up the firewall rules that you will need to allow network traffic on the internal network interface on one port, while denying traffic on the external network interface using the same port. A different port for ssh will be necessary for allowing network traffic inbound from the WAN while simultaneously denying traffic over the external WAN interface using the original port we’ve chosen.
Additionally, depending on the device that you use to access the Internet on the WAN port, you will have to configure it to allow traffic outbound on port 2347 on that device. This may be a bit different depending on your particular device.
Obviously, you will also need two separate network interface cards (NICs) attached to the server you’ve chosen. One network card will be configured to communicate with the internal LAN while the second NIC will be configured to communicate with the Internet over the WAN port.
How to Configure the Network Adapters
Since I am running the Ubuntu 20.04 LTS Server in a Virtual Machine, I configured the Network configuration to use two separate adapters: See the screenshots below:
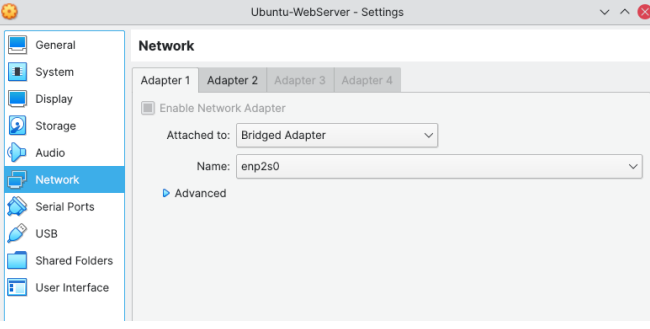
Figure 1: Network Adapter 1
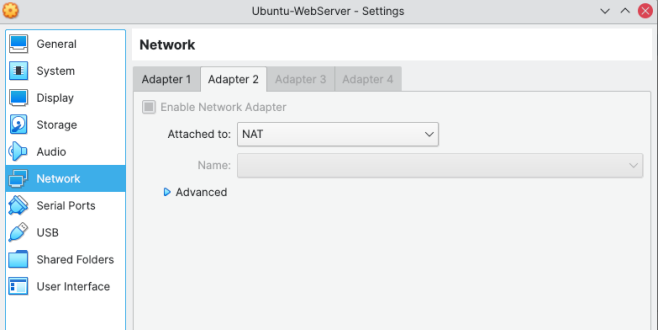
Figure 2: Network Adapter 2
After setting up the two network adapters in Ubuntu 20.04 LTS Server, you also need to configure static IPv4 addresses manually rather than allowing DHCP to do this for you. For the sake of this article and to keep things simple, we’ll ignore IPv6 addresses for the moment and disable this as well. I used the Settings interface in order to manually configure enp2s3 to the static IPv4 address of 192.168.1.30 while configuring the enp2s8 interface to the static IPv4 address of 192.168.1.35. I’m showing you the configuration for the enp2s3 interface but not the enp2s8 interface since the process is identical except for the address assignments. The two network interfaces in Settings appear as shown below:
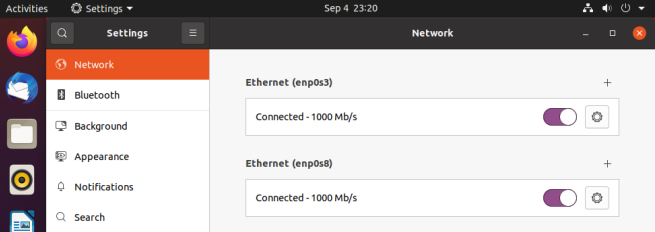
Figure 3: Network Interfaces
Clicking the gear on the right-hand side under the Ethernet (enp0s3) for the LAN adapter, we can select the IPv4 menu option, then select the Manual radio button and enter the static IPv4 address of 192.168.1.30, the network mask of 255.255.255.0 (Class C network), the Gateway IPv4 address of 192.168.1.1 and DNS IPv4 addresses below. Apply these settings, then move to the WAN network interface of enp0s8 and configure that with static IPv4 address of 192.168.1.35, keeping all other assignments as shown below the same. Next, close Settings and reboot the server.
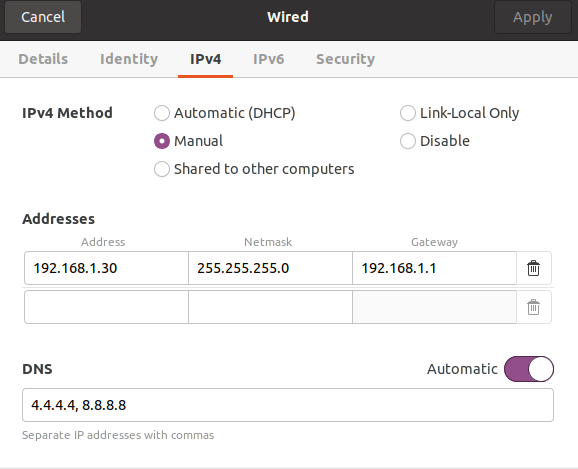
Figure 4: Statically Assigning an IP Address on the LAN
Now, open the Terminal and run the command:
$ ip addr show
which will reveal the static IPv4 address assignments on the two network interfaces as shown below:
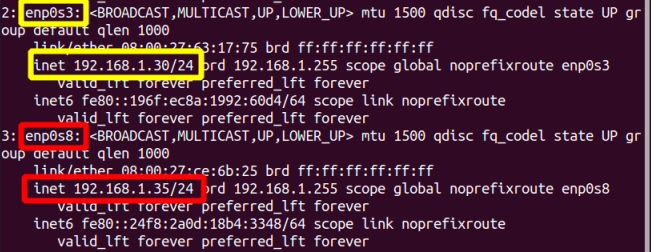
Figure 5: Showing the Static IPv4 Address Assignment in the Terminal
Once this is accomplished, we can move on to configuring SSH.
How to Configure SSH
To configure ssh on the server, open the configuration file which can be found at /etc/ssh/sshd_config and edit that file using the nano editor using the command:
$ sudo nano /etc/ssh/sshd_config
the file is edited by uncommenting the #Port22 assignment and adding a second port assignment of Port 2347 just below it, then saving and closing the file.
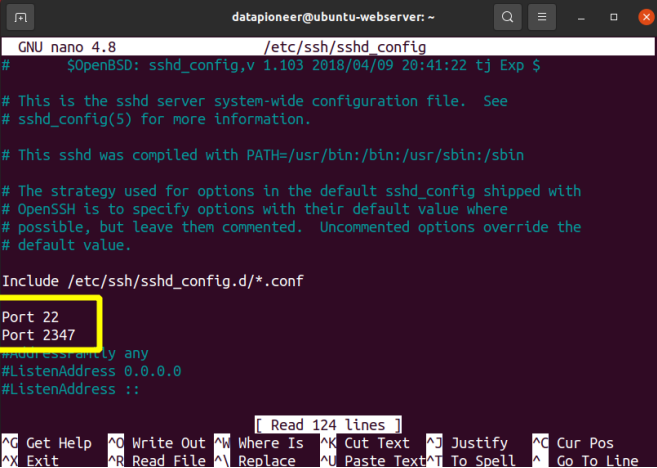
Figure 6: Editing the SSH Configuration Using Nano to Add a Second SSH Port
Now, restart the ssh server using the command:
$ sudo systemctl restart ssh
Before continuing, you will want to make sure you can ssh into both the LAN and WAN interface IPv4 addresses. To connect via ssh to the LAN issue the ssh command:
$ sudo ssh 192.168.1.30
and to connect via ssh to the WAN issue the ssh command:
$ sudo ssh 192.168.1.35 -p 2347
After successfully connecting to both interfaces using ssh, it’s time to move on to configuring the firewall to allow access on one port and deny access on the other for both interfaces.
How to Configure the Firewall
Next, we allow ssh connections to the WAN on port 2347:
$ sudo ufw allow IN on enp0s8 to ANY port 2347
Once we have that rule in place, test the ssh connectivity on both the LAN and the WAN, making sure that when you are connecting via ssh on the WAN side that you use the - p 2347 (port option) following the IPv4 address for the WAN interface: 192.168.1.35. If you run into any issues, make sure the firewall is up and running by issuing the command:
$ sudo ufw enable
And, that’s all there is to it. Now, when communicating over ssh from the WAN side you’ll be able to get in but anyone who attempts to use the well-known ssh port assignment of 22 to achieve this will be blocked. You will still be able to access the LAN via ssh using that port though.
- Log in to post comments